Key takeaways
- NEC 690.8 sizes PV source-circuit conductors and fuses at 156% of module short-circuit current: Isc × 1.25 × 1.25.
- A typical 12 V nominal panel uses 36 cells in series, each producing about 0.5-0.6 V at maximum power, for roughly 18-20 V Vmp.
- Voltage drop in a two-wire DC run is 2 × L × I × R; keeping it under 3% at 12 V often requires conductors of 4-6 AWG.
- Homemade solar panels are not listed equipment, so they generally cannot be used on buildings where NEC requires listed modules.
- DIY LiFePO4 battery banks need matched cells, a BMS rated for full inverter current and a fuse sized to the bank's short-circuit current.
Quick answer: DIY solar kits package panels, a charge controller, battery and inverter so owners can assemble a small system themselves. Low-voltage DC systems for sheds, RVs and cabins are realistic DIY projects if every circuit is fused and wired to calculated sizes. Systems connected to a home's service panel or the grid need permits, inspection and, for service work, a licensed electrician.
Do it yourself solar has moved from hobbyist soldering to bolt-together kits with plug-in connectors and app-based monitoring. That makes small systems genuinely accessible, but the safety-critical decisions have not changed: which conductor, which fuse, where to ground, and where the law draws the line between owner work and licensed work.
This guide is for hands-on owners planning a shed, van, cabin or backyard system, and for anyone curious about how to make solar electricity from the cell up. It explains what DIY can sensibly cover, how panels and battery banks are built, the wiring calculations every builder should run, and a step-by-step for a small DIY solar power system.
What Can You Safely Build With DIY Solar Kits?
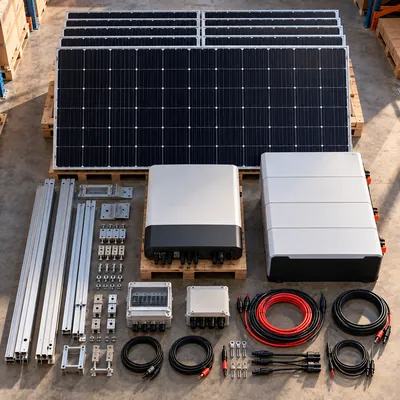
A DIY solar kit is an assembly-ready set of components chosen to work together, sold for owner installation. Whether a project is a sensible DIY job depends more on where it connects than on its size.
| Project | Typical voltage | DIY suitability | Notes |
|---|---|---|---|
| RV, van or boat system | 12-24 V DC | Good | Follow vehicle or marine wiring practice; fuse every positive conductor |
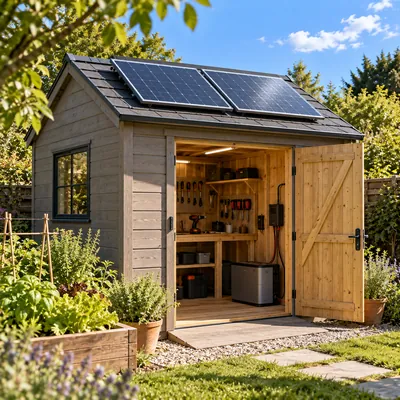
| Shed or garden lighting | 12-24 V DC | Good | Stand-alone, no building service connection |
| Off-grid cabin, 48 V | 48 V DC, 120/240 V AC | Moderate | Permanent AC wiring usually needs permits and inspection |
| Grid-tie or backup system on a home | Up to 600 V DC, service voltage AC | Limited | Permits, utility approval, inspection; service work by a licensed electrician |
| Plug-in balcony units | Module-level AC | Market-specific | Permitted in some countries only under specific rules |
Some jurisdictions allow homeowners to pull their own permits for work on their own dwelling; others do not. In every case, work on service equipment must follow local code, and connection to the grid needs utility approval. The overlap with our existing do it yourself solar system engineering guide is deliberate: that article focuses on system sizing, this one on build quality and wiring.
If you would rather buy pre-matched components than assemble from parts, read our guide to choosing a solar panel kit with battery and inverter first.
How Solar Electricity Is Made: From Cell to Panel
A solar cell is a silicon wafer with a p-n junction that converts light into direct current through the photovoltaic effect: photons free electrons, and the junction's built-in electric field drives them through an external circuit. A crystalline silicon cell produces roughly 0.6-0.7 V open-circuit and about 0.5-0.6 V at maximum power, regardless of its area; area determines current.
A panel strings cells in series to reach a useful voltage. A classic 12 V nominal panel uses 36 cells: 36 × 0.55 V ≈ 19.8 V at maximum power, enough headroom to charge a 12 V battery at about 14.4 V after losses. Modern 60, 72 and 144 half-cell modules produce 30-50 V and are meant for MPPT controllers.
How a factory makes a panel:
- Cells are sorted by current so a weak cell does not limit the string.
- Tabbing ribbon is soldered across the front and back of each cell to link them in series.
- Strings are laid on low-iron tempered glass with an EVA or POE encapsulant layer.
- A backsheet or rear glass is added and the stack is vacuum-laminated at about 140-150 °C.
- Bypass diodes in the junction box allow current to route around shaded cell groups.
- The module is framed, flash-tested and electroluminescence-inspected.
Learning how to make a solar panel by hand is instructive, but homemade panels lack lamination quality, hail resistance and UL 61730 or IEC 61215/61730 certification. Use them for education, not for roof arrays.
Building Your Own Solar Array: String Design
To build your own solar array, connect listed modules in series strings to raise voltage, and in parallel to raise current. Three rules keep the design safe:
- Voltage: the coldest-day open-circuit voltage of the string must stay below the controller or inverter maximum. Use
Voc_cold = Voc × [1 + |β| × (25 − T_min)]with the module's temperature coefficient β. - Matching: modules in one string should be the same model and orientation; mixing creates mismatch losses.
- Parallel fusing: three or more strings in parallel each need a fuse, because the other strings can backfeed a faulted one beyond the module's series fuse rating.
Worked example: string fuse sizing (NEC 690.8 and 690.9). A module has Isc = 11.5 A and a maximum series fuse rating of 25 A.
Maximum circuit current = Isc × 1.25 = 14.4 AMinimum conductor ampacity and fuse rating = 14.4 × 1.25 = 18.0 A
A 20 A PV-rated fuse sits above 18 A and below the 25 A module limit, so it is correct. The conductor must carry at least 18 A after correction for temperature and conduit fill; 12 AWG PV wire is typical for single strings.
Mount modules on racking designed for the roof or ground and local wind and snow loads. Ground-mount arrays are often the easier DIY choice: no roof penetrations, easy cleaning and adjustable tilt. Our solar panel installation guide covers racking and roof attachment.
Sizing DIY Solar Wiring: Voltage Drop and Ampacity
Low-voltage systems are unforgiving: a few tenths of a volt lost in cable is a large percentage at 12 V. Check every circuit for both ampacity (heating) and voltage drop (performance).
V_drop = 2 × L × I × R / 1,000, with L the one-way length in feet, I the current in amperes and R the conductor resistance in ohms per 1,000 ft (NEC Chapter 9, Table 8 values for stranded copper).
Worked example. A 12 V battery feeds a DC load panel 30 ft away at 20 A:
| Conductor | R (Ω/1,000 ft) | Voltage drop | % of 12 V |
|---|---|---|---|
| 10 AWG | 1.24 | 2 × 30 × 20 × 1.24 / 1,000 = 1.49 V | 12.4% |
| 6 AWG | 0.491 | 0.59 V | 4.9% |
| 4 AWG | 0.308 | 0.37 V | 3.1% |
10 AWG copper has ample ampacity for 20 A, but would lose an eighth of the voltage; 4 AWG is needed to approach the 3% target. At 24 V the same power needs half the current and a quarter of the percentage drop, which is why moving up in battery voltage is often cheaper than buying heavier copper. Our wire size calculator guide explains ampacity corrections, and the battery voltage comparison covers the 12/24/48 V decision.
Use fine-strand tinned copper for battery and inverter cables, hydraulically crimped lugs, and heat-shrink sleeves. Poor crimps cause more DIY fires than undersized conductors.
Building a DIY Solar Battery Bank
A DIY solar power battery bank built from LiFePO4 prismatic cells can save money, but it shifts responsibility for safety from a manufacturer to the builder. A 12.8 V bank uses four cells in series (4S); 25.6 V uses 8S; 51.2 V uses 16S. Capacity is cell Ah times nominal voltage: four 280 Ah cells give 4 × 3.2 V × 280 Ah ≈ 3.58 kWh.
Essential practices:
- Matched cells. Buy cells from one batch with matched capacity and internal resistance.
- Top balancing. Charge all cells in parallel to the same voltage before assembly, then let the BMS maintain balance; see our cell balancing guide.
- A BMS rated for full current. The BMS continuous rating must exceed inverter DC draw; a 2 kW inverter on 12.8 V needs about
2,000 / (12.8 × 0.9) ≈ 174 A, so a 200 A BMS. - Fixture and compression. Prismatic cells typically need light, even compression per the cell datasheet; secure the pack against vibration.
- Busbars and torque. Use the cell maker's torque value and clean contact surfaces.
- Main fuse. A class T or similar high-interrupt fuse at the positive terminal, rated for the pack's short-circuit current.
- Low-temperature protection. Block charging below 0 °C, or add pad heaters.
Add a shunt-based battery monitor for accurate state of charge, as described in our battery shunt monitor guide. DIY packs are not listed to UL 1973 or UL 9540, so they are best kept to vehicles, sheds and outbuildings rather than living spaces.
Step by Step: A Small DIY Solar Power System for a Shed
This sequence builds a stand-alone 24 V system of about 800 W of panels, a 2.5 kWh LiFePO4 battery and a 1.5-2 kW inverter, suitable for lighting, tools and chargers in a detached shed.
- Plan the loads. Total daily Wh and peak watts, then confirm the array and battery against them, as in our solar power for shed guide.
- Mount the array. Fix two 400 W modules on a ground frame or roof racking facing the equator, tilted near the site latitude.
- Wire the string. Connect modules in series, check cold Voc against the controller limit, and run PV wire to a DC disconnect.
- Install the controller. Mount the MPPT controller close to the battery; connect the battery side first so the controller detects system voltage, then the PV side.
- Install the battery. Place it on a non-combustible surface, fit the main fuse within a short distance of the positive terminal, and connect a battery disconnect.
- Connect the inverter. Use short, correctly sized cables through the fuse and disconnect; bond the inverter chassis to the grounding system.
- Wire AC outputs. Use a small AC panel with GFCI protection, and make sure there is exactly one neutral-to-ground bond.
- Commission. Set the battery profile, verify voltages with a meter, check every connection for heat under load after an hour.
Keep this system electrically separate from the house wiring. Connecting it to a building's electrical service turns it into regulated work requiring a permit and, for service equipment, a licensed electrician.
Grid-Tie DIY Solar: What Changes
A grid tie solar installation exports to the utility, and that introduces requirements that a stand-alone system does not have:
- Listed equipment. Inverters listed to UL 1741 and compliant with IEEE 1547; modules listed to UL 61730.
- Rapid shutdown. Rooftop arrays on buildings must comply with NEC 690.12, typically with module-level electronics.
- Interconnection rules. NEC 705 limits how much backfeed a panel busbar can accept; the 120% rule and supply-side connections are common points of failure in DIY designs.
- Utility agreement. The utility must approve the interconnection and often install a bidirectional meter before export is allowed.
- Inspection. The authority having jurisdiction inspects before energizing.
Self-install solar power is possible in some areas with a homeowner permit, and DIY solar installation kits for grid-tie are sold with design support. Even then, work at the service panel must follow local code and is best carried out by a licensed electrician. For solar panels with battery storage on a grid-tied home, the battery adds UL 9540 listing and NFPA 855 placement rules.
The economics of self-install versus professional install, and the incentive rules that may require certified installers, are discussed in our solar panel cost guide.
Next Steps: Specifying and Sourcing
A disciplined DIY project starts with paperwork, not tools:
- Write a load list with daily Wh and peak watts.
- Choose the system voltage from the peak load: 12 V below about 1.5 kW, 24 V to 3 kW, 48 V above.
- Draw a single-line diagram showing every conductor size, fuse rating, disconnect and grounding point.
- Run the string-voltage, fuse and voltage-drop calculations shown above and record them on the diagram.
- Check local permit rules and whether the work may be performed by the owner.
- Buy listed components with matching specifications and a complete balance-of-system list.
DIY is the right path for small stand-alone systems. When an agricultural, commercial or industrial site needs tens or hundreds of kilowatt-hours, safe operation depends on engineered storage with integrated protection. MARS builds LFP energy storage systems from 93 kWh liquid-cooled cabinets to 10 MWh containers with PCS, BMS, EMS and fire suppression, routine-tested before delivery. Send your project details via the quote request form.
Frequently asked questions
Are DIY solar kits worth it?
For sheds, RVs, cabins and small stand-alone systems, DIY kits can save labor cost and are manageable for careful builders. For grid-tied homes, savings shrink once permits, inspection, electrician work at the service panel and possible incentive requirements for certified installers are included. The value depends on project scope and local rules.
How do you make a solar panel at home?
Wire solar cells in series with tabbing ribbon, typically 36 cells for a 12 V nominal panel, then mount them on a rigid backing behind glass with a sealed frame and a bypass diode. Homemade panels are useful for learning but lack certified lamination and weather resistance, so they should not be used on buildings.
Can I install solar panels myself?
You can install stand-alone low-voltage systems yourself in most places. For systems connected to a home's electrical service or the grid, many jurisdictions require permits and inspection, some allow homeowner permits, and the utility must approve interconnection. Work on service equipment should be done by a licensed electrician.
What size fuse do I need for a solar panel?
Multiply the module short-circuit current by 1.25 and again by 1.25, as required by NEC 690.8, then choose the next standard PV fuse at or above that value but not above the module's maximum series fuse rating. For Isc of 11.5 A, the minimum is 18 A, so a 20 A fuse.
Is it cheaper to build your own solar system?
Building your own small system usually saves labor, which can be a large part of installed cost for residential systems. Savings narrow for grid-tied systems once permits, inspection, electrician fees and tools are included, and DIY work may affect warranties or incentive eligibility. Compare complete quotes before deciding.
What battery is best for a DIY solar system?
LiFePO4 is the best choice for most DIY solar systems because it offers thousands of cycles, 80-90% usable capacity, no maintenance and good thermal stability. Choose a battery or cell set with a BMS rated above your inverter's full-load DC current, low-temperature charge protection and a properly rated main fuse.
Written and reviewed by the MARS application engineering team in Shanghai, who specify and test transformers, switchgear, substations and battery storage for projects in 40+ countries. Last updated .
Tags: diy solar kits solar installation kit diy solar panel diy solar power system how to make a solar panel